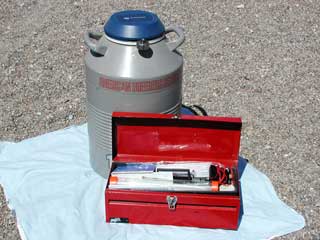
| Figure #1: This picture shows a typical semen storage tank and a metal tool box used to keep equipment clean and easily accessible. |
semen storage/tank design | a.i. equipment list | semen handling | thawing the semen | loading the insemination gun | temperature control after thawing | cleaning the equipment | record keeping
Introduction: The following information contains details on the equipment used for transcervical artificial insemination (A.I.) and basic semen storage and handling. This information should be used as a reference guide for basic questions. It is highly recommended that people beginning to learn how to A.I. take a course on A.I. or be instructed directly from someone who is knowledgeable in this area. Many of the skills, techniques, precautions, and common problems associated with A.I. cannot be outlined in this discussion. Hands-on training and experience are usually necessary to reach satisfactory conception rates.
Semen Storage/Tank Design: Frozen semen is stored on the farm in a tank filled with liquid nitrogen. This unit is somewhat like a thermos bottle in design with a rugged outer jacket of aluminum or stainless steel and an inner compartment that contains liquid nitrogen and the canisters that hold canes of semen. The space between the inner and outer jackets is insulated and under extreme vacuum. A hard foam insulating plug extends from the top and continues down into the neck of the unit to minimize evaporation and keep foreign objects out of the tank.
The temperature of liquid nitrogen is -196
º C (-320º F), and the space above the refrigerant but below the neck of the tank is only a few degrees warmer. Rate of evaporation, or holding time, depends on tank construction. In order to maintain the desired temperature, the tank must be refilled before the nitrogen has completely evaporated. Refilling usually occurs when there is approximately four inches of nitrogen left. Depending on the tank, it may need to be refilled every 6 weeks to every 4 months.The tank must be kept upright and protected from injury at all times. Damage may result in a loss of vacuum which allows evaporation to occur rapidly. If the damage goes unnoticed, the tank may go dry in less than 24 hours, and the semen will no longer be usable. A frost spot anywhere on the outer jacket indicates that nitrogen is boiling away, and the semen should be transferred to another tank immediately. The nitrogen level should be checked frequently and recorded between scheduled refills to ensure that the evaporation rate is not too great. The liquid nitrogen level in the tank can be measured by inserting a wooden yardstick into the tank for 10-30 seconds. Remove it from the tank and wave it vigorously for 5 seconds. The position of the frost line is equal to the depth of the liquid nitrogen in the tank.
Six to eight canisters, which hold a variable number of canes of semen, are suspended from the top of the tank neck. Each canister is a hollow metal cylinder open at the top with a perforated bottom. This construction allows access from the top while permitting liquid nitrogen and vapor to pass through the bottom.
Semen is usually packaged in 1/2 cc straws. Straws are placed into containers called goblets, usually in groups of 5 straws. Two goblets snap into each cane, one above the other. At the top of the cane, a metal tab is marked with the bull’s name or code number. To ensure positive identification, each breeding unit is labeled with the male’s registered name, his breed association number, and the freeze code or processing date.
It is very important to keep an accurate inventory of the contents of the semen tank. It will save time and reduce exposure to the warmer air outside the tank. The following are a few suggestions for maintaining an inventory:
Page K750 has an example of a semen tank inventory chart that can be printed and used to record the above information.
Caution:
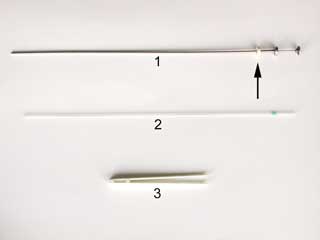
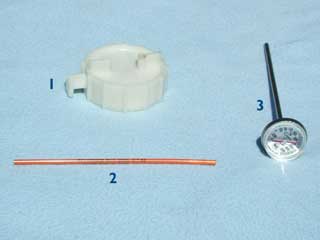
A.I. Equipment List (see below):
Artificial insemination equipment can be purchased from most semen processors or one of the dairy and farm supply companies that carry various cattle related items.
Warning: Dial thermometers work very well and are easy to read, but if dropped or damaged, they may not be accurate. Digital thermometers are very accurate and excellent to check against the dial thermometer to confirm accuracy. If the thermometer is inaccurate and the temperature of the thawing water exceeds 100
º F, the semen could lose its fertilizing capability. It is acceptable for the semen to be 90º F, but the semen will be destroyed if it exceeds 100º F.Semen Handling: Frozen semen is a fragile product, and all temperature fluctuations decrease semen quality to some degree. For practical purposes, the most damaging temperatures begin in the neck of the tank where a transition to atmospheric temperature is evidenced by a frost line. The number of exposures to the warmer temperatures of the neck and the environment must be minimized. If implemented, the following tips will reduce temperature fluctuation and damage to semen:
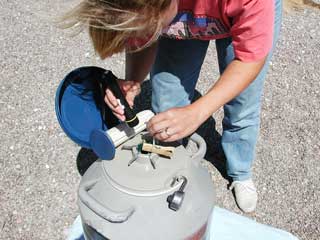
To remove a single straw from the tank, move the canister from its storage position into the center of the tank. Raise the canister slightly and, while it is still down below the neck, use a flashlight to locate the desired cane of semen within the canister. Lower the canister to the center floor of the tank for 30 seconds, then raise it again into the neck with the right hand and grasp the desired cane in the left hand. Lower the canister immediately, then use straw tweezers to grasp the desired straw. Bending the tab up at the top of the cane may facilitate straw removal. Do not bend straws. When the top goblet is empty, move it all the way to the top of the cane to facilitate removal of straws from the lower goblet. Because it prevents straws below from floating out of the lower goblet, do not remove the top goblet. Never keep canes up in the neck for more than 5 seconds.
To transfer entire canes from a shipping tank to the farm storage tank, place the two side by side. Position the receiving canister in the center of the tank, raise the canister in the shipper just high enough to grasp a cane, then lower the canister immediately while the transfer is being completed. This transfer must be completed within 5 seconds to prevent exposure to warm temperatures that can elevate the semen temperature to a critical point.
Special Note: Whether it is a liquid or vapor, liquid nitrogen is listed as a Hazard Material by the Department of Transportation.
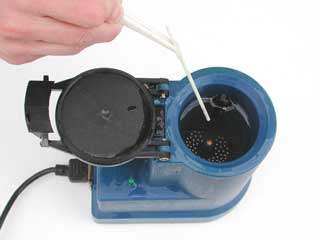
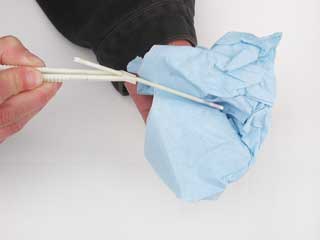
Thawing the Semen: Fill the thaw jar with 95°F water, and check it frequently to ensure the temperature is constant, adding more hot water if necessary. Remove the desired straw from the tank (as per instructions mentioned previously) and immediately place it in the thaw jar, handling the straw by the tip only or with the straw tweezers. (The warmth from a person’s fingers can cause the semen to warm unevenly, thus lowering the number of live sperm post-thaw.) Remove the straw from the thaw jar after 45 seconds. If properly handled, the semen will remain viable for up to 15 minutes post-thaw. Water is spermicidal, so dry the straw thoroughly with a paper towel.
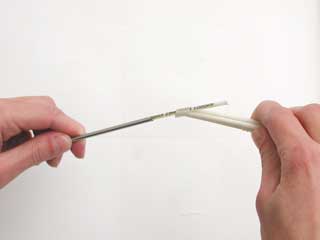
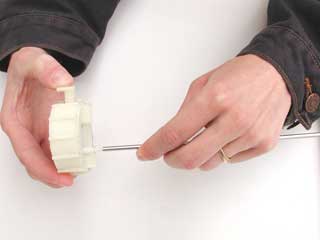
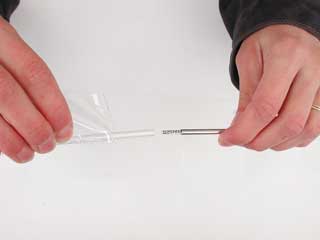
Loading the Insemination Gun (see figures #5-9 below): The following steps should be taken when loading the insemination gun:
Temperature Control After Thawing: Since the straws are thawed in 95 degree water, thermal protection must be provided, especially on cold days. Never allow semen to refreeze! Try to keep the semen temperature near 95 degrees while loading the gun and preparing to breed the cow. Research has shown that the temperature of semen will change to the environmental temperature in about 30 seconds if held in an unprotected gun.
During hot weather, before loading the straw, make sure the insemination gun is not so hot that it will cook the semen. For maximum thermal protection during cold weather, the use of individually packaged sheaths is recommended in the following procedure:
This procedure not only thermally protects the semen, but also hygienically protects the sheath until insemination. An alternative to using individually packaged sheaths is to wrap the loaded gun with a clean paper towel. When done correctly, this procedure provides thermal and hygienic protection of semen and equipment.
Cleaning Equipment: While artificial insemination cannot be completely aseptic, it should be performed in as clean a manner as possible. Insemination sheaths are disposable and should be used only once. All equipment should be washed in soapy water on a regular basis. Rinse all equipment thoroughly with hot water after washing.
Record Keeping: A certain percentage of inseminations will fail to result in conceptions. The best way to determine why the attempt failed is to keep accurate records on each animal’s cycle and each insemination. In evaluating a missed conception consider these questions: Was the female in late standing heat? Was the insemination too early or late? Was the air temperature below freezing (this could chill thawed semen and kill sperm)? Was the cervical penetration insufficient? Was the female cycling normally?
* Pictures and captions associated with the semen handling process can be found below.
* Some of the information for this article was used with permission from Select Sires, Plain City, OH 43064. Phone # 614-873-4683.
|
|
 |
|
 |
|
 |
|
 |
|
 |
|
 |
|
 |
|
 |
|