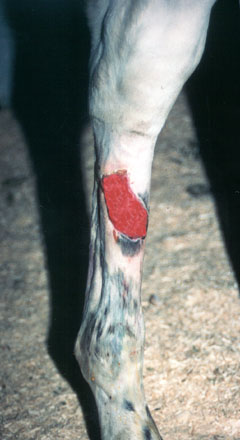
stop the bleeding |
clean the wound |
bandage the wound | tendon and joint
injuries | puncture wounds |
proud flesh
Introduction: Every horse owner that has had horses for any length of
time has seen and probably treated a horse with a laceration or wound. Some of
the injuries may be minor, requiring only a little cleaning and maybe a bandage,
while others require immediate first aid, sutures (stitches) and even surgery to
repair. The suggestions given in the following information will help an owner
identify what type of injuries require veterinary attention and what injuries
can be handled at home. Information on how to apply various wraps and bandages
will also be included.
Step #1 - Stop the Bleeding: The first step in treating a horse with a
laceration is to stop excessive bleeding. If it is only a minor wound with a
small amount of blood, apply pressure to the injury by hand using a clean gauze
pad or piece of roll cotton. Apply direct pressure for about 3-5 minutes and
then gently remove bandage. If the bleeding continues, reapply the bandage, or
if it is blood soaked, use a new one.
For wounds that bleed more severely, a covering should be applied to the
wound and then wrapped with gauze and vet wrap forming a pressure bandage. Roll
cotton makes a good initial layer. It should not be too bulky or thick. If it is
too thick, it will be difficult to wrap the bandage tight enough to get the
bleeding to stop. After the roll cotton or other bandage is applied, gauze and
then elastic or vet wrap and tape should be wrapped around the cotton. This can
be applied almost as tight as the vet wrap will withstand. This will give the
necessary pressure to help stop the bleeding. This bandage should be left on
for 20-30 minutes maximum. Because it may cause additional tissue damage, a
pressure bandage should not be left on for extended periods of time. If the
horse continues to bleed after the pressure bandage has been removed, apply a
new one. If the bleeding is extremely severe and completely soaks the initial
bandage in just a few minutes, a new bandage may need to be applied over the old
one.
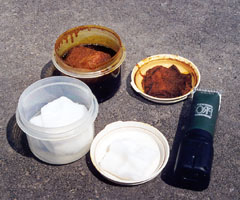
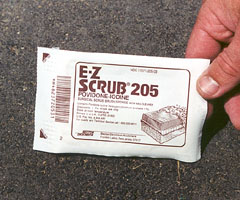
Step #2 - Clean the Wound: Once the wound has stopped bleeding, the
injured area should be cleaned. Almost all wounds should have the hair around
the injury clipped. There are two types of solutions that are commonly used to
clean the wound: chlorhexidine (Nolvasan) or povidone-iodine (betadine). Both of
these products can come as a scrub or a solution. When using the scrubs, they
should not be diluted with water. They should be used full strength and applied
to a gauze pad or piece of cotton. The piece of gauze or cotton can then be used
to gently scrub the wound. Start in the middle of the injured area and then work
to the outside edges of the wound. Do not scrub back into the center of the
wound until a new piece of gauze is used. When using betadine scrubs, it is
common to use an alcohol soaked piece of gauze or cotton after each betadine
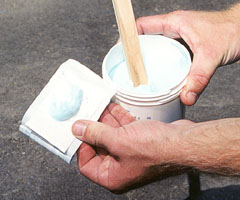
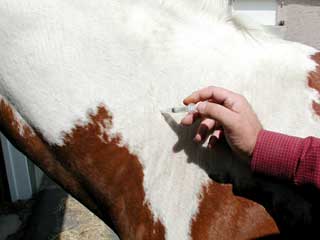
scrub. The pictures
and descriptions below
contain information on various products used
to clean a wound.
In some injuries that are contaminated with dirt, manure, hair, etc., it is
sometimes helpful to flush the wound with diluted chlorhexidine or povidone-iodine
solution. The povidone-iodine should be diluted with water to make a tea colored
solution. The chlorhexidine should be diluted according to label directions
(often it is 3 fluid ounces to 1 gallon). The flushing of the wound can be done
using a spray bottle or a syringe with an 18 gauge needle on it. These methods
will provide sufficient pressure to remove the debris. However, care should be
taken to avoid pushing any contamination deeper into the wound. When possible,
it is best to let a veterinarian do the cleaning if the bleeding will not stop
or if cleaning the wound makes the bleeding worse.
Step #3 - Bandage the Wound: There are many different methods of
bandaging a wound. In general, the primary reason for bandaging a wound is to
keep it clean and allow antibiotics and other ointments or creams to contact the
wound surface. For wounds on parts of the body other than the legs, the key is
covering the wound with sterile gauze or Telfa pad and then using plenty of tape
or adhesive. Some wounds on the neck or body of the horse can be covered with a
sterile pad, and then layers of gauze, wraps or tape can be placed completely
around the neck or body to hold the bandage in place. These bandages that go
completely around the neck or body of the horse should be placed with very
little tension. They should hold the bandage in place, but allow the horse to
freely move.
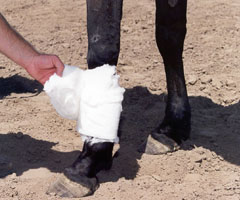
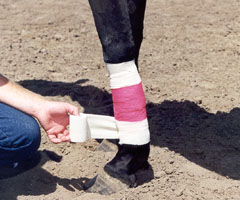
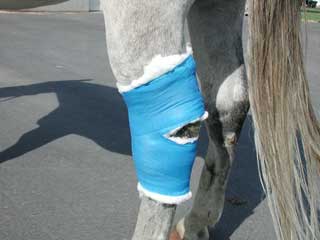
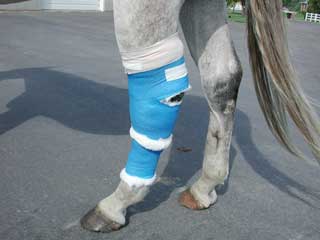
Most bandages for the legs consist of three main layers: a thin covering
layer (gauze or Telfa pad), a thicker cotton layer, and then a layer to hold it
all together (vet or polo wraps).
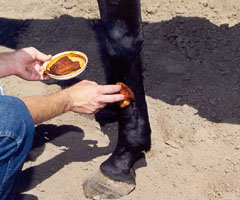
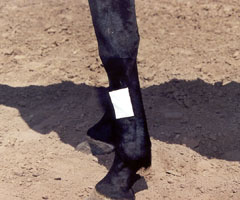
Layer 1 - Gauze or Telfa pad: The gauze or Telfa pad can be placed
directly on the laceration. If the wound is still contaminated or has a
significant amount of tissue damage, it is best to use gauze in this initial
layer. The gauze has the tendency to stick or adhere to the wound surface and
when removed will help clear debris and dead tissue from the wound. The gauze,
however, will also make the wound bleed more when it is removed. If the wound is
clean and the bandage should not stick to the injured areas, use a Telfa pad.
These are non-adhering, sterile pads that can be changed regularly without
interrupting the healing of the wound. Depending on the type of wound and if the
wound will be sutured, antibiotic ointment and sprays are often applied directly
to the laceration or on the pad surface. See figures #5-7
below.
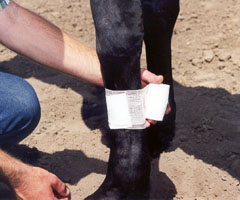
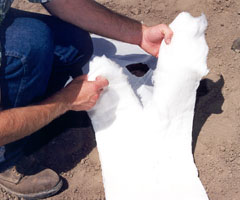
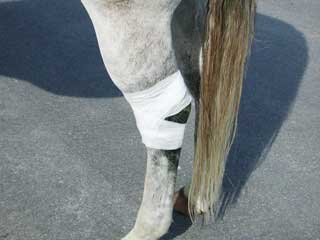
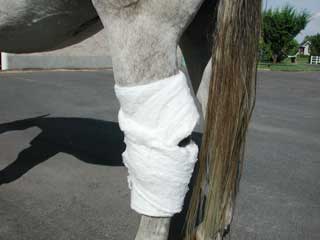
Layer 2 - Cotton or padding: This layer makes up the bulk of the bandage
and is valuable in providing support and protection for the injured area and in
absorbing additional blood and discharge. The cotton should be wrapped around
the injured area in a tight, but smooth fashion. Leaving any bulges or wrinkles
in the bandage can cause abnormal pressure and potential injury. For smaller
injuries and when bandaging the hock, roll cotton can be split in half to allow
easier use.
To provide sufficient protection, a minimum of two layers of cotton should be
added around a limb. If more than 4 or 5 layers are placed around a leg, the
bandage can become too bulky and may be prone to slip. The cotton should go well
above and well below the injury. Some professionals recommend that when
bandaging injuries on the lower limb, wrap over the hoof. This helps prevent the
bandage from getting too tight and also helps keep it in place.
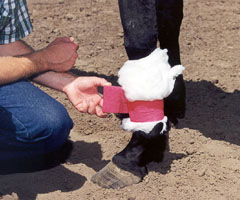
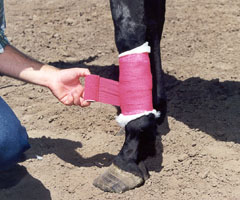
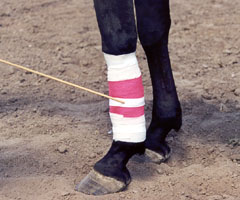
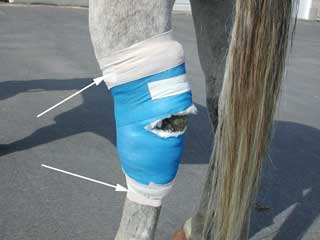
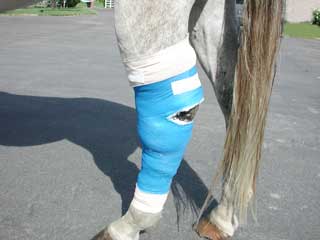
Layer 3 - The holding layer: The cotton or padding layer is usually held
in place with polo or vet wraps, or sometimes a layer of gauze is placed over
the cotton and then vet wrap is placed over the gauze. Like the cotton, these
should also be placed snugly and smoothly around a leg. Vet wrap can be placed
too tightly on the limb. To ensure that this does not happen, use plenty of
cotton padding and pull the vet wrap just tight enough to remove the wrinkles.
Only place the vet wrap over areas that have been previously covered with the
cotton. Placing vet wrap directly on the skin can cause tissue damage if it
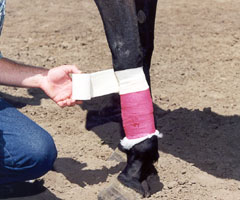
constricts the blood flow. After the vet wrap is applied, at least one or two
fingers should be able to be placed under the bandage. If vet wrap has been
used, it is helpful to place tape around the wrap to keep it from unraveling. It
is also helpful to place some Elastakon on the top and bottom of a bandage on
the leg. This helps to keep the bandage in place and will prevent dirt and
debris from working under the bandage. See figures #10-14
below.
General Recommendations:
- Determining if the horse should go to the veterinarian: If the
injury does not break through the full thickness of the skin, the area should
be cleaned with soapy water and then watched for evidence of infection,
swelling, and pain. These injuries often do not need veterinary attention, but
should be watched carefully. Antibacterial sprays and creams, along with
bandaging, can be applied as needed. To determine if the cut goes through the
full thickness of the skin, gently separate the skin edges. If they pull
apart, the cut goes all the way through the skin and it should probably be
stitched (sutured). This may depend on if there is enough skin to completely
close the wound and where the wound is located. Many large and deep injuries
in the chest and shoulder regions are cleaned, packed and then left
predominantly open to heal. Severely contaminated and infected injuries are
treated in a similar fashion. In injuries where the skin has been removed (a
"de-gloving" injury) over a significant area, bandaging may be all that can be
done. If there is ever a question on what should be done with a laceration,
take the horse to a veterinarian.
- What to put on the wound: Just by walking into a farm store it is
easy to see that there are literally dozens of products to put on a wound. All
of them claiming to help the injury heal better than anything else. To find
what really works can be challenging at best.
Because preventing any infection is a high priority, many veterinarians
recommend that the product contain an antimicrobial agent. Some of the most
common include iodine (betadine), neomycin, or nitrofurazone. In addition to
the antimicrobial, there are a wide range of additional ingredients that can
be added to the mixture. For most wounds, a simple antibacterial ointment or
spray is all that is really needed. The first rule in using any type of
topical ointment or cream is to completely clean the wound before putting
anything in it. If there is contamination left in the wound, the ointment will
have a tougher time controlling the infection. Because the creams and
ointments collect debris and dirt, the wound should be cleaned daily or should
be covered with a bandage. After each cleaning, new ointment or spray should
be applied.
- How often to change the bandage: The bandage should be changed any
time it becomes wet or discharge from the wound has soaked through. This may
mean a change is needed as often as once or twice a day. Three days is usually
the maximum time the wound should be covered with a bandage before it is
changed. At each bandage change, the wound and used bandage material should be
examined for evidence of infection. A foul smelling discharge (pus) and dark
discoloration on the bandage material would indicate an infection.
- Should injectable or oral antibiotics be given: For lacerations
that do not go completely through the skin, antibiotics in addition to topical
products are not usually necessary. However, when the wound is extensive,
contaminated, or appears to be infected, injectable antibiotics are important.
Injectable products are also essential with puncture type injuries. The most
commonly prescribed product is usually penicillin.
- Tetanus: If the injury has broken the skin, always give a tetanus
shot. Horses are very prone to tetanus and should receive a tetanus booster
even if they have been vaccinated during the previous year. This is
particularly important when a puncture type injury has occurred.
- Tendon and joint injuries: All tendon and joint injuries require
veterinarian attention to properly treat. If an injury is suspected of
entering a joint or severing a tendon, it is best to try and clean the wound
with sterile saline or water, bandage the area, and then take the horse to a
veterinarian. The use of concentrated chlorhexidine (Nolvasan) or povidone-iodine
(betadine) in these areas should be avoided. These products can cause
irritation to the tissues of the tendon and joint. These injuries require
special irrigation fluids and techniques that should be administered by a
veterinarian.
The best thing an owner can do when one of these types of injures occurs is to
clean the wounded area with sterile water or saline, and wrap the injured area
with a bandage. A support bandage should be used to stabilize a tendon injury.
These support bandages are thicker and help immobilize the injured limb better
than those bandages described previously. To create a support bandage, start
with the techniques mentioned previously. Once the second layer of cotton has
been applied, wrap the leg with gauze and repeat the cotton layer again.
Continue this process of cotton then gauze until the bandage is about three
times the size of the leg. Cover the last layer of gauze with vet wrap and
take the horse to the veterinarian.
- Puncture Wounds and Foreign Objects: These types of wounds can be
very dangerous for the horse because dirt, hair, debris, and bacterial
organisms can be taken into the deeper tissues of the body. Once there, these
contaminants are difficult to remove, and the wounds are often hard to treat.
Puncture wounds are very prone to infection and complications. Horses are also
very prone to tetanus. For these reasons, all puncture wounds should be
examined by a veterinarian. If the object that created the puncture wound is
still present, it is usually best to leave it in place and let a veterinarian
remove it. Removing a foreign object such as a nail or piece of wire can
sometimes cause significant bleeding or additional problems. It is also
helpful for the veterinarian to see how far the object penetrated the body. If
necessary, the object can be cut off close to the skin surface. If the object,
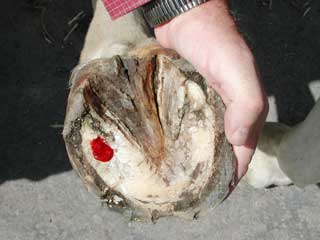
such as a nail, is in the bottom of the foot and the horse will be forced to
walk long distances, it is probably wise to try and remove it. It is best to
mark the area where the object entered the foot and then mark on the object
how far it went into the foot. This will help in making treatment decisions
and then in predicting the outcome of the problem.
If the foreign object is not present, the wound edges should be clipped free
of hair and then the wound cleaned. Dilute betadine is usually what is used to
clean the wound. A syringe filled with dilute betadine can be used to flush
the wound and remove contaminating debris. Care should be taken, however, to
not push debris deeper into the wound. If there is concern about the flushing
or any other part of cleaning the wound, it is best to let a veterinarian
perform the cleaning. All puncture wounds should remain open to the air and
have the ability to drain any infection out the opening. Bandages are often
not placed over the puncture unless additional contamination will occur.
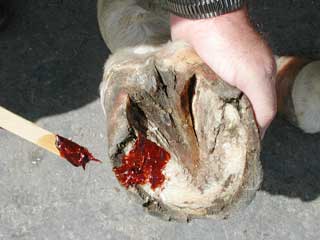
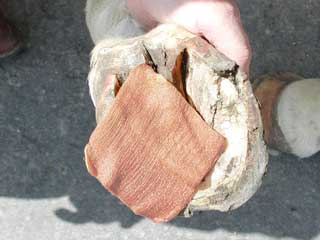
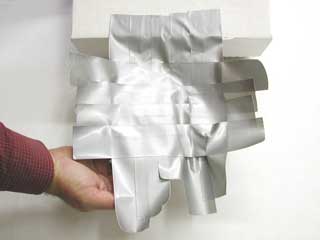
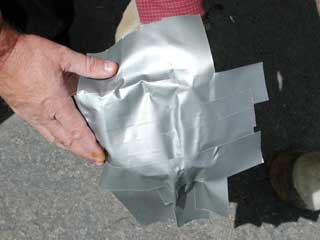
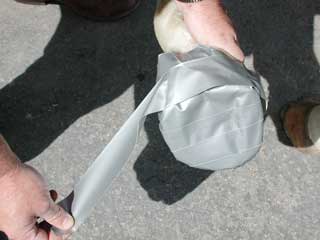
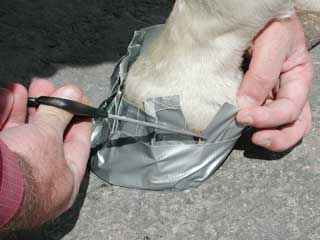
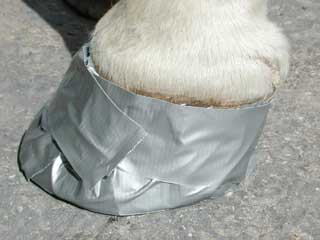
Puncture wounds on the bottom of the feet are ones that will likely become
contaminated. These types of wounds should be covered in some fashion. This
may require an Easyboot or placing some gauze pads soaked in betadine over the
puncture area and then adding layers of duct tape to hold things in place and
help water proof the foot. All horses that receive a puncture wound should
receive a tetanus booster, even if they have had one during the previous year.
See below for additional details.
- Proud Flesh: Proud flesh is a common response or outcome to
lacerations on the lower limbs of horses. Proud flesh is actually excessive
granulation tissue that extends above the skin surface and delays the healing
process. It is often grey to tan in color and can have the texture of
cauliflower.
To limit the chances of a wound developing proud flesh, any wounds on the
lower limbs should have the hair clipped, the wound cleaned, and then be
sutured. When suturing is not possible, the wound should be covered with a
counterpressure bandage and the wound cleaned on a regular basis. Topical
antibiotic ointments such as betadine or nitrofurazone are also typically
used. If infection is not present, ointments that also contain steroid can be
used. Irritation from flies and the horse licking the wound should also be
prevented. If these steps are not taken, the wound may become infected,
delaying the healing process and increasing the chances for proud flesh to
develop. Because excessive movement of the tissues in an injured area slows
the healing process, movement should also be restricted. This can be
accomplished by bandaging the leg or applying a cast. Strict stall rest is
also important. The main goal of all of these procedures is to help the wound
heal faster and thus prevent proud flesh from developing.
If the wound does develop proud flesh, there are really two major things that
can be done. The first and probably most common is surgically removing the
excessive granulation tissue. The proud flesh is removed with a scalpel blade
down to or even below the original skin surface. This requires that the horse
be sedated during the procedure. This causes some fairly significant bleeding
that often requires bandaging.
The other option is to apply a caustic cream or ointment to the proud flesh
that actually eats away at the excessive tissue. This will not only remove the
proud flesh, but also has the tendency to kill normal cells and delay healing.
Because of this, most veterinarians recommend that the extra granulation
tissue be removed surgically.
After the extra granulation tissue is removed, an ointment (Panolog - page
H836) containing a steroid and often an antibiotic is applied to the area.
Steroids are known to help prevent the proud flesh from forming again.
However, because steroids inhibit the body’s response to infections, these
ointments should not be used where the wound is infected. If used in excess,
the steroids can also delay the healing process. For these reasons, it is
important to involve a veterinarian when treating proud flesh.
Depending on the size and location of the wound where the proud flesh was
removed, it may take 3 weeks to many months for it to heal. In some cases, the
extra proud flesh may need to be removed a second and even a third time before
complete healing takes place. Even with careful treatment, some wounds heal
with extra scar tissue and even hair color changes.
Bandaging a Wound:
Note:
